Hi, Friends of the Farm! Suzanne here, and today I’m sharing a tutorial here and on The Greeting Farm blog on how to make roses out of something you may have in your pantry…coffee filters! With this technique, you’ll be making a garden of roses in no time!
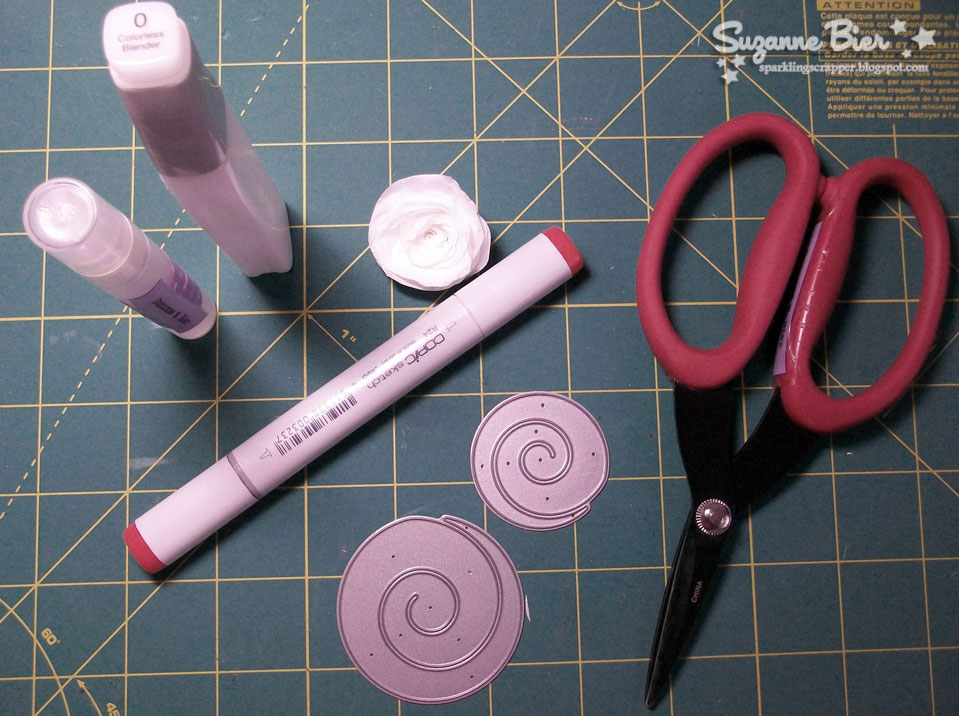
My supply list:
- white coffee filters (I use 5-6 filters per flower)
- adhesive dots
- scissors/rolled flower die
- manual die-cutting machine
- alcohol-based marker and blending solution
While you can find rolled flower dies fairly easily, you can also make these if you don’t have one of the dies. I’ll show you both ways to make the flowers, and I’ll start with the non-die method!
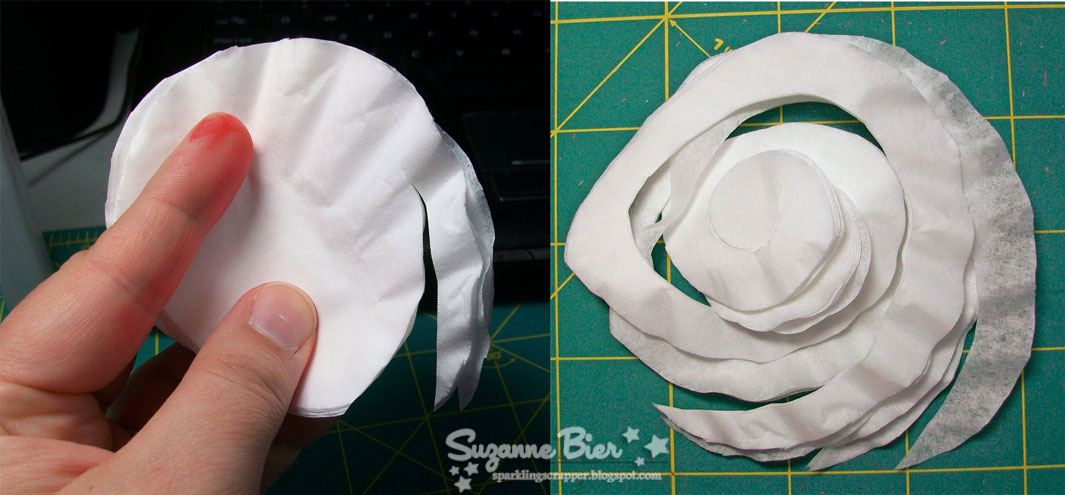
Cut a circle out of a bundle of 5-6 coffee filters, folded in half. Your circle doesn’t have to be perfectly round. Mine usually come out in a more oval shape when I hand-cut them.
Start at one point on the circle and cut a spiral into the layered circles. Leave a larger part uncut in the center. (This will help you keep the flower together after you’ve rolled it.) It will look like the spiral on the right.
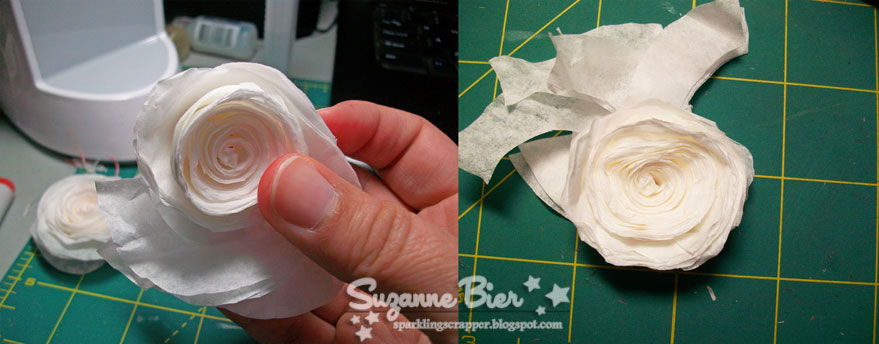
Now, you’re ready to roll! Try your best to keep all the layers together, and start with the pointed end, then roll toward the center. The layers tend to separate more once you get near the end.
I recommend letting the center unroll a bit before you add adhesive dots. Letting it loosen a bit helps to give your flower more volume. You’ll be able to fix the layers more after it’s secured. Stick several dots to the bottom center, depending on the size of your flower. With a larger flower, you’ll want more dots on the bottom to help all the layers stick.
Wrap the rest of the layers under the flower and stick them to the adhesive dots. It’s OK if you have excess strands. I just cut off the part that sticks out.
You can also use a rolled flower die in a die cut machine if you have one. I use my dies cutting sides down on top of the filters after folding them in half. You can see what they look like after they’re run through the machine.
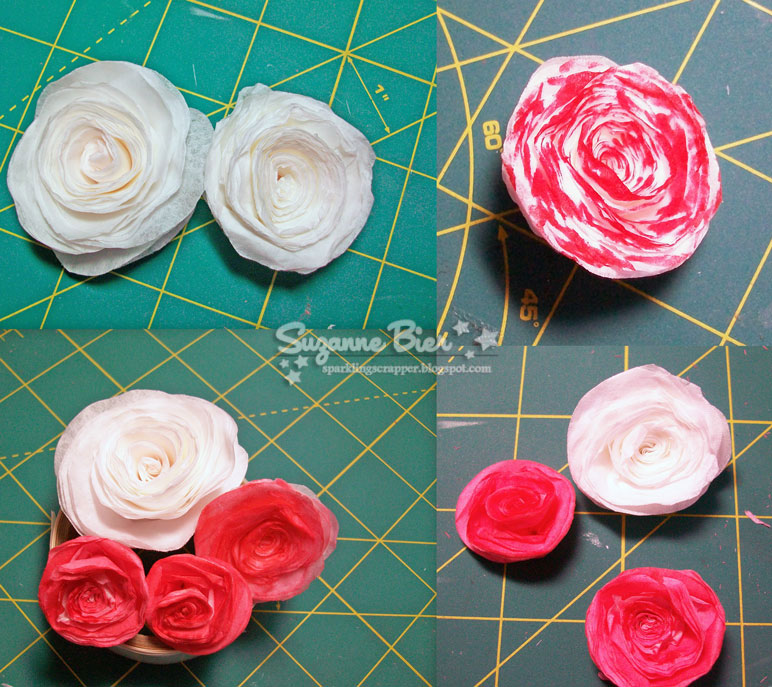
I often color the coffee filters before die cutting them with the chisel end of an alcohol marker. I spray colorless blender solution on the filters and rub it in so that the solution soaks the ink and the paper.
Rolling and finishing the die cut version works the same way as if you’d hand cut the spirals yourself. The advantage to using a die is that it’s easier to keep all of the layers together, but you’re able to create more sizes without the die. I roll the colored flowers with the color on the inside.
You can also color the flower after it’s assembled with an alcohol-based marker. Then spray blending solution on the flower and rub it in. When it’s assembled, it’s very sturdy, so you shouldn’t have to worry about it coming apart.
I haven’t tried using spray mists to add color, but I’d like to hear if you do! I think this technique would also work well with tissue paper, which has the advantage of being available in many different colors.
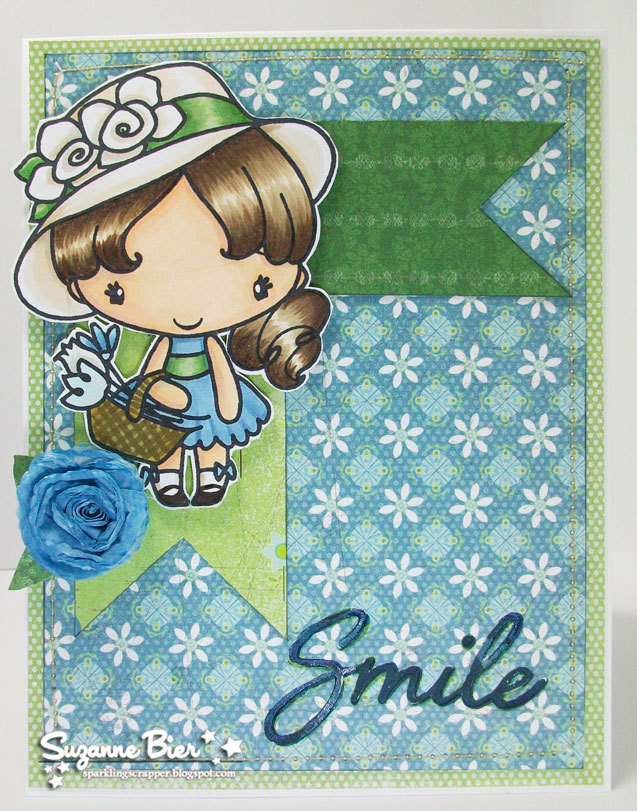
Here are some examples of cards that I’ve made that include these flowers:
I hope you’ve enjoyed my tutorial today! If you make some roses of your own, I’d love to see them! Just share your link with me in the comment section!
Thanks so much for stopping by today!
Hugs,


Great tutorial, Suzanne! I'm not much of a flower girl, but these look super easy and turn out really nice!
Fabulous tutorial Suzanne! I need to give these a try. I'm thinking of maybe using distress inks and water to color them also 🙂
I definately tried this and it came out awesome! thank you so much for the fab tutorial My rose