Lawnscaping FIT March Blog Hop!

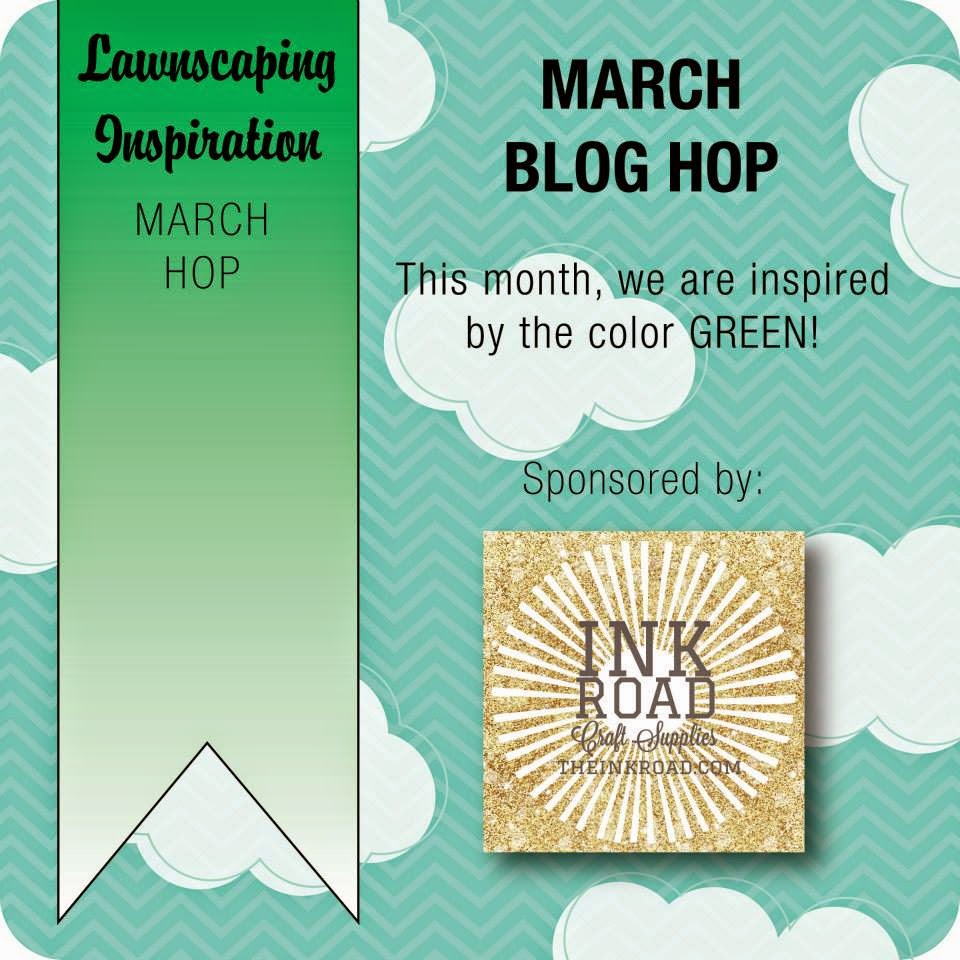
It’s the last Friday of the month, so that means it’s time for the Lawnscaping Challenge Facebook Inspiration Team’s (FIT) Monthly Blog Hop! You’ve probably arrived from Sabine‘s blog, but in case you’re starting here, you’ll find the full hop list at the bottom of my post!


This month’s hop is being sponsored by The Ink RoadBe sure to visit The Ink Road and Lara’s blog! We’ll be picking a winner from all of the comments left on our hop to receive a gift certificate to The Ink Road!
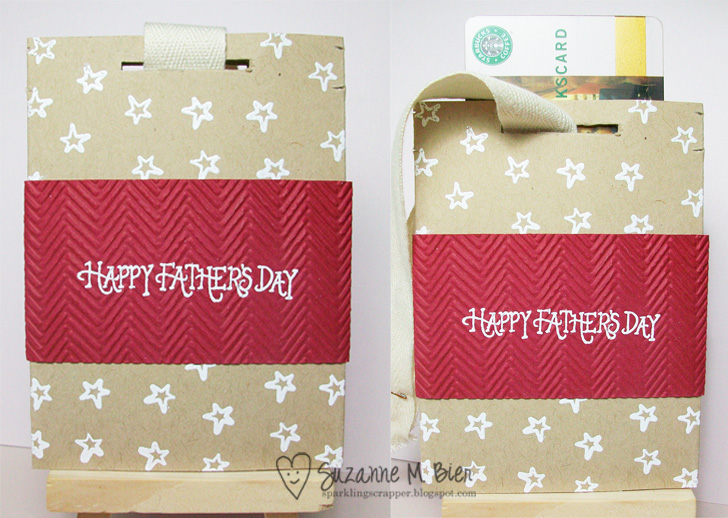
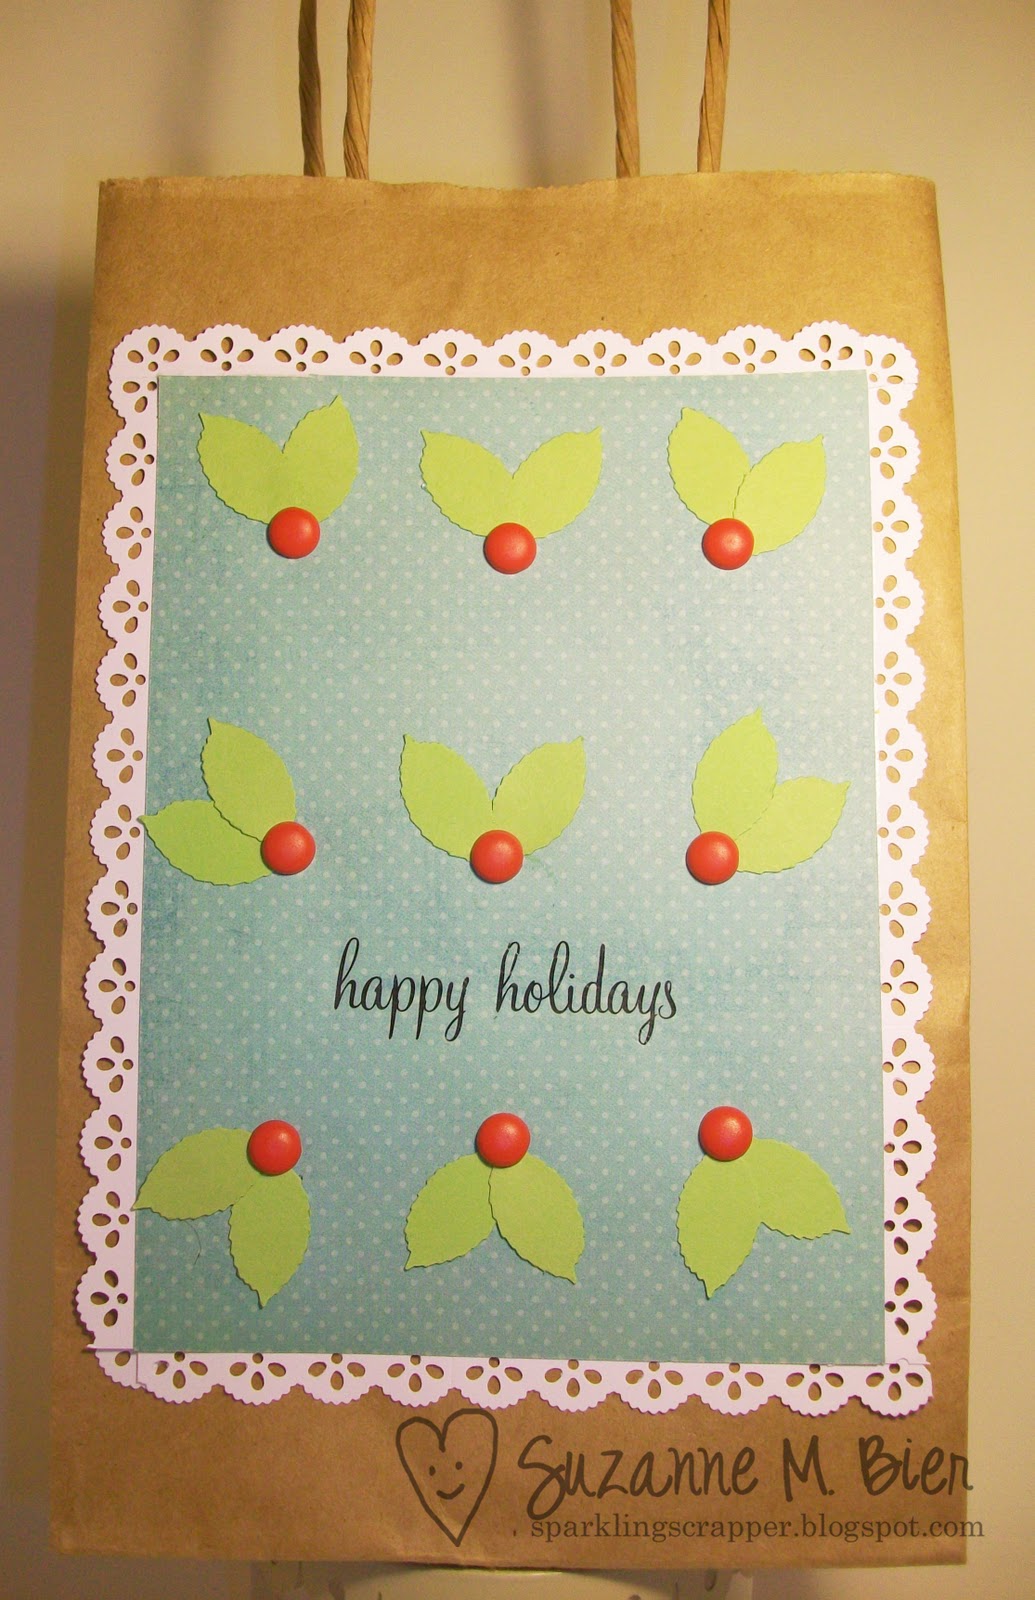
This month, the FIT is inspired by GREEN, so I made a mini gift bag and a gift card holder with Lawn Fawn’s “Love You A Latte” and “My Lucky Charm” sets. I made both the gift bag and the card holder with the Goodie Bag Lawn Cuts die. 


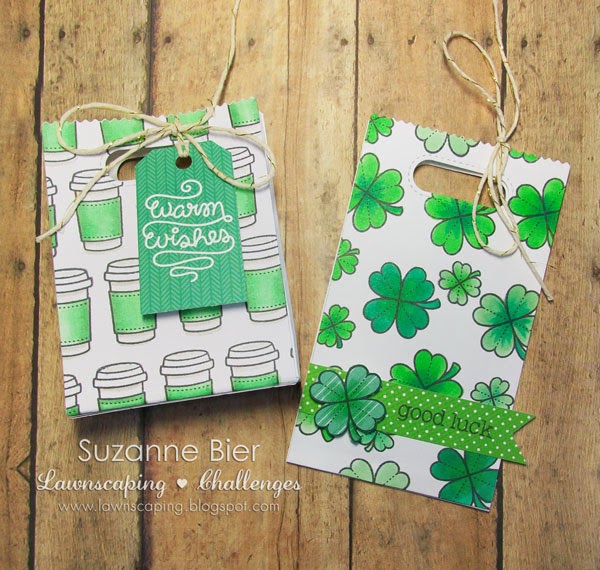
I made the custom paper by stamping patterns on white card stock and coloring the images. 

Here’s our full blog hop order:
Suzanne – you’re here!
Before you continue the hop at Marina‘s blog, be sure to leave a comment for me so you can increase your chance of being the lucky winner of a gift certificate to The Ink Road!

Thanks so much for stopping by today! I hope you’re enjoying all of the inspiration in today’s hop and are going to have some time to craft this weekend!


OH! OH! OH! It’s a HOL-ODD-DAY Hop!

WELCOME to our Hol-ODD-Day Hop!  ‘Tis the season for the Odd Girls to get their craft on, and whip up some fun things just in time for the holidays!   Some Odd Girl is very happy to bring you our annual…

holodddayhop

This year, we are STOKED to bring you some of our gift and decor ideas that we hope will inspire you as we all head into the home stretch!  Today, we HOP!  All you have to do is visit all of the blogs in the hop and leave some love at each stop.

You should have arrived from Anna Sigga’s blog – if so, you’re definitely on the right track! If you need to start at the beginning, CLICK HERE, cause you won’t want to miss a beat!

For my hop project, I altered a metal container by decoupaging some fun holiday papers on the top, and I made a tag with the “HoliDeer” clear set.


Because you can’t have a gift container without adding something SWEET inside, I put together this tag making kit! There are two mini ink pads, blank tags, twine and a stamp set! It would be a great gift for a crafty friend who loves to stamp and color! (Depending on your gift budget, you could also add a few markers or pencils!)
Because birthdays are one of the most common gift-giving occasions, I made some sample tags with the “Birthday Mae” and “Tiny Baker Tia” clear sets. I kept the design simple so there’s room to write on the tag and colored two of the tags so you could get an idea of the finished project.

Needless to say, we have had a TON of fun making our Hol-ODD-Day projects, and we hope you have fun hopping with us!  Ready?  Here’s the hop list!

Suzanne Bier – you’re here!

So hop around, take your time, leave your comments between now and Sunday, December 15th and we’ll have some winners to announce on Monday, the 16th!  There may or may not be a stamp set or two up for grabs.  There may ALSO be (or maybe not!) some of the new Odds & Ends to win!  ANNNND there may even be some extras.  But you’ll have to join us throughout the week to find out!

Now you’re off to Kristy’s blog!  Enjoy the hop, Oddies, and we’ll be showing details of some of the projects throughout the week, so drop by and watch for your bonus chances to win!

Thanks so much for stopping by today! Hope you enjoy the rest of the fun on our HOL-ODD-DAY hop!

Hugs,

YNS Fun Friday! – Thanks a Latte!

Happy Friday, crafty pals! It’s my turn to post again at Your Next Stamp for Fun Friday, and today, I’m sharing a cute gift card holder that features one of my all-time favorite YNS images, “Ellie Loves Lattes,” as well as a couple of the new YNS Whatnots dies.
Even though Christmas has come and gone, this would still be a great project for anytime you are in need of a gift card holder for a birthday, special occasion, or a thank you gift!
I started with a free pdf template for my project, but I made some changes. I didn’t include the top tag shape or the fastener portions. I used the size of the template to make a pocket to adhere to the front of a small note card, because that leaves room to write a special note to the recipient on the inside.
I also punched a half circle on the pocket to make it easier to get to the gift card. 
To make sure the gift card doesn’t fall out, I cut a long piece of twine and wrapped it around the card, then punched a small hole at the bottom of the pocket. Once the gift card is in the pocket, the twine is tied through the punched hole, and voila! The gift card stays in place!
Supplies: Your Next Stamp (“Ellie Loves Lattes” stamp set, Whatnots Seasons Set One Dies), papers (Bo Bunny Double Dot, Crate Paper, Copic markers, watermark ink, opaque white embossing powder, twine (Trendy Twine), Stickles, Liquid Pearls, free PDF template (Carolyn’s Stamp Store).

Thanks bunches for stopping by! I hope you have a totally fun Friday and a wonderful weekend! 

To see what the other members of the Your Next Stamp team have created to inspire you, just stop by the YNS blog! I’ll be back tomorrow with a year in review wrap-up post, and again on Sunday with a new Christmas Card Challenge!

Whimsy & Stars Studio Christmas Blog Hop!


Can you feel it? Christmas is in the air! To get ready for the season, we’re having a blog hop to show off all the Christmas and winter-themed images available from Whimsy and Stars Studio and to introduce the new Winter 2013 design team! 

I’m one of the new DT members, and I’m super excited to be part of the team…it’s going to be so much fun creating with all these talented ladies, and showing you all the fun things we’ll create with Mabelle R.O.’s latest digi stamps!

If you just arrived from Melissa’s blog, you’re on the right track!  If not, please start at the beginning of the hop at the Whimsy and Stars Studio blog to make sure you don’t miss out on anything! 

As you hop along, you’ll want to leave a comment for each member of the design team! After the hop ends on Friday, December 7th at midnight EST, one random winner, to be announced on the Whimsy and Stars Studio blog on December 8th, will be picked from all the comments received to win the Grand Prize of THREE Digi Stamps! (How cool is that?)

I love the decorations and festive nature of the Christmas season…especially all of the creative gifts and packaging ideas! We haven’t put up our tree yet, but we plan to this week!

For my project, I used the image “Felicity“. I also used two special images…details on how to get them can be found below my project photos!


Here’s a close-up of my card:


The two special images featured on my gift bag are FREE gifts with each purchase from the Whimsy and Stars Studio Etsy Store from today until Friday, December 7 at midnight EST! With your order, you’ll get to choose either “Stocking Ted” or “Xmas Tag” as your free gift! Because these are digi stamps, there are so many fun and creative possibilities for either image!

      
Thank you for hopping with us today!  Your next stop on the hop is the talented Tracy’s blog. 
Don’t forget to leave a comment at each stop on the hop to increase your chance of winning the Grand Prize!

Thanks so much for stopping by!
Hugs,

P.S. Here’s a master list of all the blogs on the hop:
Cheryl  
Lesa  
Suzanne (you’re here)  

Friday Fun: Halloween Treat Toppers

Hi, crafty friends! I’m popping today in to share some treat toppers I made for a recent get-together with some of my best crafty gal pals: 
(click on the picture for a closer look)

Here’s my supply list for these toppers. (The actual sizes for your project will vary depending on what size treat bag you use.)

  • Spellbinders Labels 28 (I used the two largest dies to layer the paper and card stock.)
  • Spellbinders Lacey Circles die
  • Spellbinders Classic Circles die
  • Digital Stamp (Tickled Pink Stamps – “Lil Pinkette Witch Audrey”)
  • Sentiment stamp (Impress Rubber Stamps – Happy Halloween script)
  • Copic markers
  • Patterned paper (Graphic 45)
  • card stock (Core’dinations)
  • clear cellophane treat bags
  • a sweet treat

To make assembly easier, I die cut the card stock, paper, digital image and mat first.

Then, I colored each image, one section at a time. After coloring, I assembled each topper, inking the edges of the paper and centering it over the card stock, adhering, then folding it in half. Then, I added the image and its mat on top. Finally, I stamped the sentiment, cut each one out, and layered it on top of the image.

To attached the toppers, I folded the treat bag down and used a staple on each top corner to keep it closed.

Here’s a close-up of the finished topper:

(click on the picture for a closer look)

These are really fun to make, and easy once you get all the pieces together. Hope you enjoyed these and were inspired to create some treat bag toppers of your own!
Hope you have a wonderfully creative weekend! Thanks so much for stopping by! 
Hugs,

DeNami Blog Hop: Cards for Guys!

Hi! I hope you’re having fun checking out all the super cool cards for the special guys, dudes and dads in your life! You probably arrived here from Lisa Elton‘s blog, and now you’re visiting me (Suzanne Bier)!

Don’t forget to leave comments for all the participants as you hop along…two lucky commenters will each win a $20 mini shopping spree on the DeNami Design web site!
I made two cards for the hop! The first is a regular greeting card and the second is a “pull-up” gift card holder!
DeNami supplies: sentiment stamp (Happy Father’s Day cling), image stamps (Mini Heart, Mini Star), watermark ink (VersaMark – available in the DeNami store), opaque white embossing powder. Other supplies: cardstock, embossing folder, brown ink.
I didn’t have a tie stamp, so I created a tie-shaped template and traced it onto various scraps of cardstock. I stamped the patterns on each tie with watermark ink, then heat embossed each one. 
(I drew the dots on the red tie with a watermark pen because I didn’t have the dot stamp, but you could also use DeNami’s Teeny Swiss Dot stamp if you want to!)
I adhered each tie onto the embossed cardstock panel, stamped the sentiment, then adhered it on the bottom right.
My second card is a gift card holder, and it’s pretty easy to do! (Side note: I used the same star and sentiment stamps that I used on the first card.)
I cut a strip of card stock measuring 4 1/4″ wide by 10 3/4″ long and folded it into thirds. I used a tape runner to seal the bottom and the back. Then I stamped and embossed the stars on the front and back. 
I cut a slit through the top (this one measures 1 1/4″ by 1/8″, but as long as the twill tape or ribbon can pass through easily, it doesn’t matter if the measurements are exact.)
I cut a piece of twill tape that measures about 18 inches, folded it in half, and put the gift card in the middle. I threaded one side through each side of the pocket and secured the two sides of the twill together with a staple.
To finish off the design, I stamped and heat embossed the sentiment on a strip of coordinating card stock, then dry embossed the strip, wrapped it around the gift card holder and adhered it.

Now, when your favorite guy pulls down on the twill tape, the card pops out! 
Your next stop on the hop is the fabulous Wendy Elliot! I’m sure she’s created something totally awesome for the hop! In case you want to start at the beginning, the full list of participants is on the DeNami Designs blog!
Don’t forget…you have until Monday, June 11, 2012, 11:59 pm PST, to leave comments on all the blogs (to be eligible for one of the two $20 DeNami mini shopping sprees).
Thanks so much for stopping by! 

DeNami Valentine Blog Hop!

Hi! You’ve probably arrived from Ruza‘s blog, and now you’re visiting me (Suzanne)! Thanks for stopping by to see what I’ve created for this month’s DeNami Blog Hop!

My first project is a quick treat packaging idea:
I made a tag for each treat using the heart stamp from DeNami’s Sugar Cookies Trifles stamp set, stamping it once on kraft cardstock, then again on white cardstock in brown ink. I layered the white stamped image on the kraft image, and colored the “sprinkles” with a marker. 
The sentiment on each tag was stamped with watermark ink (from DeNami’s Love Sentiments Petit Fours set), then heat embossed with white embossing powder. I used an opaque white marker to create the border, adhered the heart to the tag, then adhered the red strip onto the kraft tag.
Then, I filled a paper cupcake wrapper with candy and placed it in a clear treat bag. The tag is then tied to the clear bag with a combination of red raffia and red/white twine.
Here’s a close-up of one of the bags:
My second project is a pencil topper. I stamped and colored DeNami Design’s Puppy Love Circle stamp, then used a metal die to cut out the image. If you have a coordinating circle or scalloped circle punch, that will work, too!
I rolled a 1/2″ strip of white cardstock around the top of the pencil, securing the end with adhesive. I rolled a glue dot onto the seam of the rolled strip, then adhered the stamped image. Finally, to strengthen the topper, I cut a 2 1/2″ long strip of white cardstock, rolled adhesive on the strip, then lined it up with the back of the topper and adhered it. The extra strip helps to keep the design from curling.
Don’t forget to leave comments on all of the participants’ blogs for a chance to win a $20 gift certificate to DeNami Design’s web store! You have until January 9, 2012 at 11:59 pm Pacific Time to leave your comments!
Your next stop on the hop is Tammy‘s blog! I’m sure she’s created something sweet to show you! If you need to get back on track, visit the DeNami blog for a list of all of the hop participants! And be sure to leave them some love to let them know how much you’ve enjoyed the hop!
I hope you’ve been inspired by my projects! Thanks so much for stopping by! 

Denami Blog Hop: Gift Wrapping!

Hi! Thanks for stopping by to see what I’ve created for the DeNami “Gift Wrapping” blog hop!


You should have arrived from Wendy Harril‘s blog, and now you’re at my blog (Suzanne Bier)! In case you get overwhelmed by all the fabulous gift wrapping ideas along the hop and lose your way, you can always go back to the DeNami blog to get back on track!

For this hop, I made a small gift bag that you can make out of any size of paper to fit your gift! (I used 6″x6″ cardstock.) 

Supplies: cardstock, watermark ink (VersaMark), white embossing powder ,  snowflake stamp (DeNami  Med. Lacy Flake), sentiment stamp (DeNami Contempo Christmas), ribbon, tissue paper.

First, stamp (and heat emboss, if you want to) your design on two 6″x6″ squares of heavy patterned paper or cardstock. One square will be the front of your bag; the other will be the back. Then, score in 1″ on the bottom and sides of each piece of paper. 


Before doing any folding or cutting, you can use a border punch or decorative scissors on the top of each square to make your bag look a bit fancier when it’s complete. (It’s easier to cut or punch at this point, because it’s so much harder to do it evenly later; I learned that the hard way!)

Cut a slit along each side of each square in the lower corners of each sheet, fold in the bottom and sides to create a “box” bottom. Then, adhere one bottom to the other, nesting one half inside of the other to make a bag. I’ve found it’s easier to adhere the sides at the same time. Just put adhesive on the outer sides of the half that you are nesting inside the other.

Then, punch two holes in the top and thread ribbon through each side to create handles.

I also created a matching gift tag and threaded it through the ribbon before I made the handles. If you add a tag later, it’s easy to tie one on the handle with twine!

Don’t forget to leave comments on all the blogs you visit for your chance to win a $20 DeNami gift certificate! One random participant and TWO lucky commenters will win! You have until December 12, 2011, 11:59 pm PST, to leave comments on ALL of the blogs (to be eligible for a prize).

Your next stop on the DeNami hop is Lani Misner! I’m sure she’s got something fantastic for you to see!

Thanks again for stopping by!

colourQ #114

Happy Tuesday and welcome back for another colourQ challenge! 


I was able to start my Christmas shopping yesterday. I really wanted to start earlier, but it’s kind of hard to do when you’re not really sure what to get someone and you have to wait for their actual Christmas wish list! I picked up some stocking stuffers and also gifts for two of my nieces, some fabric for two gift projects, and ordered a gift for my husband.


This week, we’re adding another dimension to our normal colourQ challenge: to create “anything but a card.” I decorated a kraft gift bag for my project:

Supplies: kraft gift bag, cardstock (Stampin’ Up – Certainly Celery, Whisper White), leaf punch (Martha Stewart Crafts), patterned paper (My Mind’s Eye), brads (Basic Grey), rub-on (Making Memories).
Since Cool Caribbean has been retired for a while, I tried my best to match the color with paper that I had available. I punched the leaves out of Certainly Celery and paired them with a brad to make holly. I punched border strips from white cardstock to make the border around the panel, and then adhered the panel to the bag. The sentiment is a rub-on that I had in my stash.

For your reference, here are our colors for this week:


I hope you’ll play along with us this week!

To be considered for this week’s colourQueen, make sure to link your creation at the colourQ blog by Sunday, December 11 at noon Central Time! Don’t forget to display the challenge colors and link back to the colourQ blog in your entry post.

As always, The rest of the colourQ Royal Court have created some festive and fun projects with this week’s colors! You can see them on the colourQ blog or by visiting their personal blogs. (The links are to the left under the thumbnail of this week’s challenge colors.) 

Thanks so much for stopping by! I can’t wait to see what you’ll create with this week’s colourQ!